Showing posts with label applique. Show all posts

Thursday, 13 November 2014

a monster and a wand

Beware those beady eyes....

and those chomping teeth...


IT'S A MONSTER.  

RUN AWAY!!


Or you could get out your wand if that is more your style.


Fun appliques.

Wednesday, 26 September 2012

Some quick kiddie T-shirts

A play date at the zoo today with 2 of Little Imp's interstate cousins.  Given I never get around to posting gifts & we hadn't seen them for a while I decided to quickly make them some t-shirts.  Given Little Imp's fascination (bordering on obsession) with 'raff's' at present, the zoo theme of the day and some spotty orange fabric found hiding in my stash, a new giraffe design seemed in order.

This is what eventuated:


Free motion embroidery around ears and 'ossicones'
Mostly the same process used making these ones as for all my other applique T-shirts.  Heat-n-Bond the cut out fabric design onto the shirt and then zigzag stitch around the main parts (neck, head and muzzle).  The ears and 'ossicones' were secured with free motion machine embroidery (even Nature Ranger me had to look up the real name for the antler/horns that a giraffe has - did you know they are the only animal in the world to have ossicones?!).  To stop the stretchy shirt material puckering I placed a small piece of thin webbing on the inside of the shirt & then stitched through this and the ears/ossicones.  Once all stitched I trimmed the webbing down with rounded edges.

Thankfully I had thought ahead for the possible tears if one certain Imp didn't have her own 'Raff', whipping up an extra one on an old shirt last night for Little Imp.  Good thinking that, she was pleased!!

Saturday, 7 July 2012

Recovering an armchair - Part 2


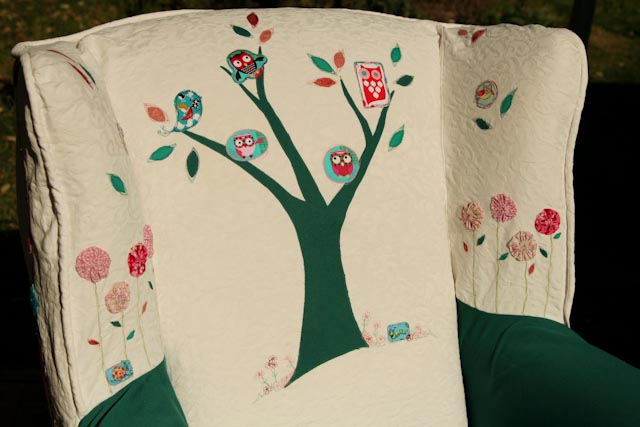
Little Imp's armchair is complete, with little matching pillows.  What fun I've had.  Check back to Recovering an Armchair Part One for the chair used to look like.  I ended up replacing only the bits in green - the front skirt, arm rests and a piece under the main cushion & kept the original white of the old chair cover for the rest.  The embellishing is made up of a combination of free form machine embroidery, Heat-&-Bond iron on adhesive to attach fabric pieces, hand stitching, felt & buttons.

But for now I might just let the pictures do the talking.


Little flowers and bugs hide at the base of the tree under the cushions & Sullfok puff flowers grow on the wings

Fabric embroidered birds on a ribbon wire with bright buttons & flowers


Applique and free form machine embroidery toadstools and flowers on the front skirt

A hand stitched tree & machine embroidered flowers on the armrest 


Felt embroidered circles & fabric owls on ribbon 

A line of elephants


Wednesday, 14 March 2012

In the time it takes to clean the house...


How I will remember the Summer of 2012...
My feet are still giving me grief.  Moonboot on all my waking hours for the last 3 weeks while we swelter through heat wave after heatwave.  Euugh!

Trying to stay positive, I can come up with 2.5 good things that have come of this boot wearing.
1. My feet are beautifully soft and smooth - no hard, rough or dry skin here.  Husband says they are softer even than Little Imp's baby bottom!
2. I've hired a house cleaner.  This is the winning point.  She started today and I think she might be here to stay, even after the moon boot is no more.

Oh, and the half point of a good thing goes to Little Imp who has well and truly mastered the words 'shoe' and 'boot', and knows the difference between the two.

Look at what I did this morning in the time it took Cleaning Lady to clean the house.  Both productive ventures with good outcomes, but I know which I prefer!


Friday, 24 February 2012

Hot air balloons...and some more owls

Little Imp's feature wall gets busier.

I hung all of the frames I have finished so far yesterday afternoon and this morning I received the payoff when Little Imp stood up in her cot and saw the designs coming together on her wall.
'Wow' she exclaimed, with the enthusiasm only a 21-month-old can muster at that time of the morning!

The Hot Air Balloons frame is an embroidery I did years ago (1993 according to the date on the back).  I used a design from a library book, but no idea who to credit it to.  Anyhow, it fits perfectly in one of the frames I have for Little Imp's feature wall, so in it goes!

The balloons, clouds and landscape were embroidered onto calico that I had dyed blue and then I remember using mum's water colour paints to extend the scene onto the white cardboard frame.  A long time ago...


And some more owls....


Sunday, 12 February 2012

Mini quilt - in a frame

I've finished the first frame for Little Imp's feature wall!

I wanted to combine some of the sewing techniques I have been playing with and practicing over the last year or so, quilting, free motion embroidery, applique.  This is how it turned out.  As you can see, I'm still getting mileage out of one of my favourite fabrics - an owl print I've used to make many owl baby grows already, and a number of the other owls are earmarked for other frames already.  So there will be more!


I'm not sure that this is truly a 'mini-quilt', but the background has the look of lots of tiny pieces of fabric being pieced together like a quilt.  To achieve the haphazard layered look I cheated a bit by ironing my little bits of fabric onto a pre-cut piece of heat-and-bond, including the owls.

The pieced fabric 'sheet' before being ironed onto the aqua backing fabric
Then for some free motion embroidery.  Haphazard stitching around each little piece of fabric, sometimes going around more than once to reach the next section.  This is what the back looked like.  Almost tempted to frame this, I do like geometry designs.

And here are some close ups of the design detail.

Tree positioned just so Mrs Owl can perch on her branch
An appliqued tree and leaves, edged with free form stitching and some little flowers. 

Some free form flowers embellished with  buttons
Not all of the pictures for Little Imp's feature wall frames are going to be this detailed.  But it actually didn't take too long to make once I had worked out the design & how I would put it all together.  One picture frame down....

Wednesday, 18 January 2012

More Elephants

Keeping with the elephant theme after making many a George the Elephant Kings / Queens (!) I crafted an applique elephant baby top for a friend who is awaiting her little boy's arrival.  I bought a large piece of elephant print stretch material on sale last year with the idea it could become a summer sleeping bag for a little one, or a great stretchy swaddle.  I loved stretchy swaddles when wrapping up Little Imp - so much harder for her to escape from her mummified state in stretch fabric!

After making the elephant softie for my friend I decided an elephant swaddle and matching applique top would make a perfect gift bundle.

Swaddle material in the background & copied elephant ready to applique
Basic 'How To'
I used fabric pens to copy the elephant design onto plain cotton fabric which I then roughly cut out & framed with strips of matching printed fabric scraps.  After using 'Heat & Bond' to iron the whole piece to the top I used a smallish sized blanket stitch around the outside edge to fix the fabric to the top & stop the edges fraying with wear and tear.  A straight stitch on the plain fabric to frame the elephant finished it off.

And then I made another one, and another.... The more girly ones also had a free motion embroidered flower embellishment added for fun.


I labeled these tops using the alphabet embroidery card on my sewing machine to stitch 'OneLittleImp' on felt,  & then sewed this label on the back neck line. Much neater than the handwritten labels I've made in the past.


Sunday, 24 July 2011

Freestyle

Experimenting again with some freestyle stitching in this wee singlet design.  Straight stitch around Mr Tortoise & then random twirls and circles of different coloured straight stitch over and around 3 fabric dots underneath.  Realise that ribbed material like this is not the best to use, especially as I am a bit lazy & didn't use any sort of fabric support to stop the ribbing from stretching one way & then the next.  But happy enough with the outcome overall.  Just lucky to find some time in the last week to do anything with working 4 days a week, building extensions happening around us and illness plaguing each one of us in turn.


Tuesday, 21 June 2011

We all scream for ice cream

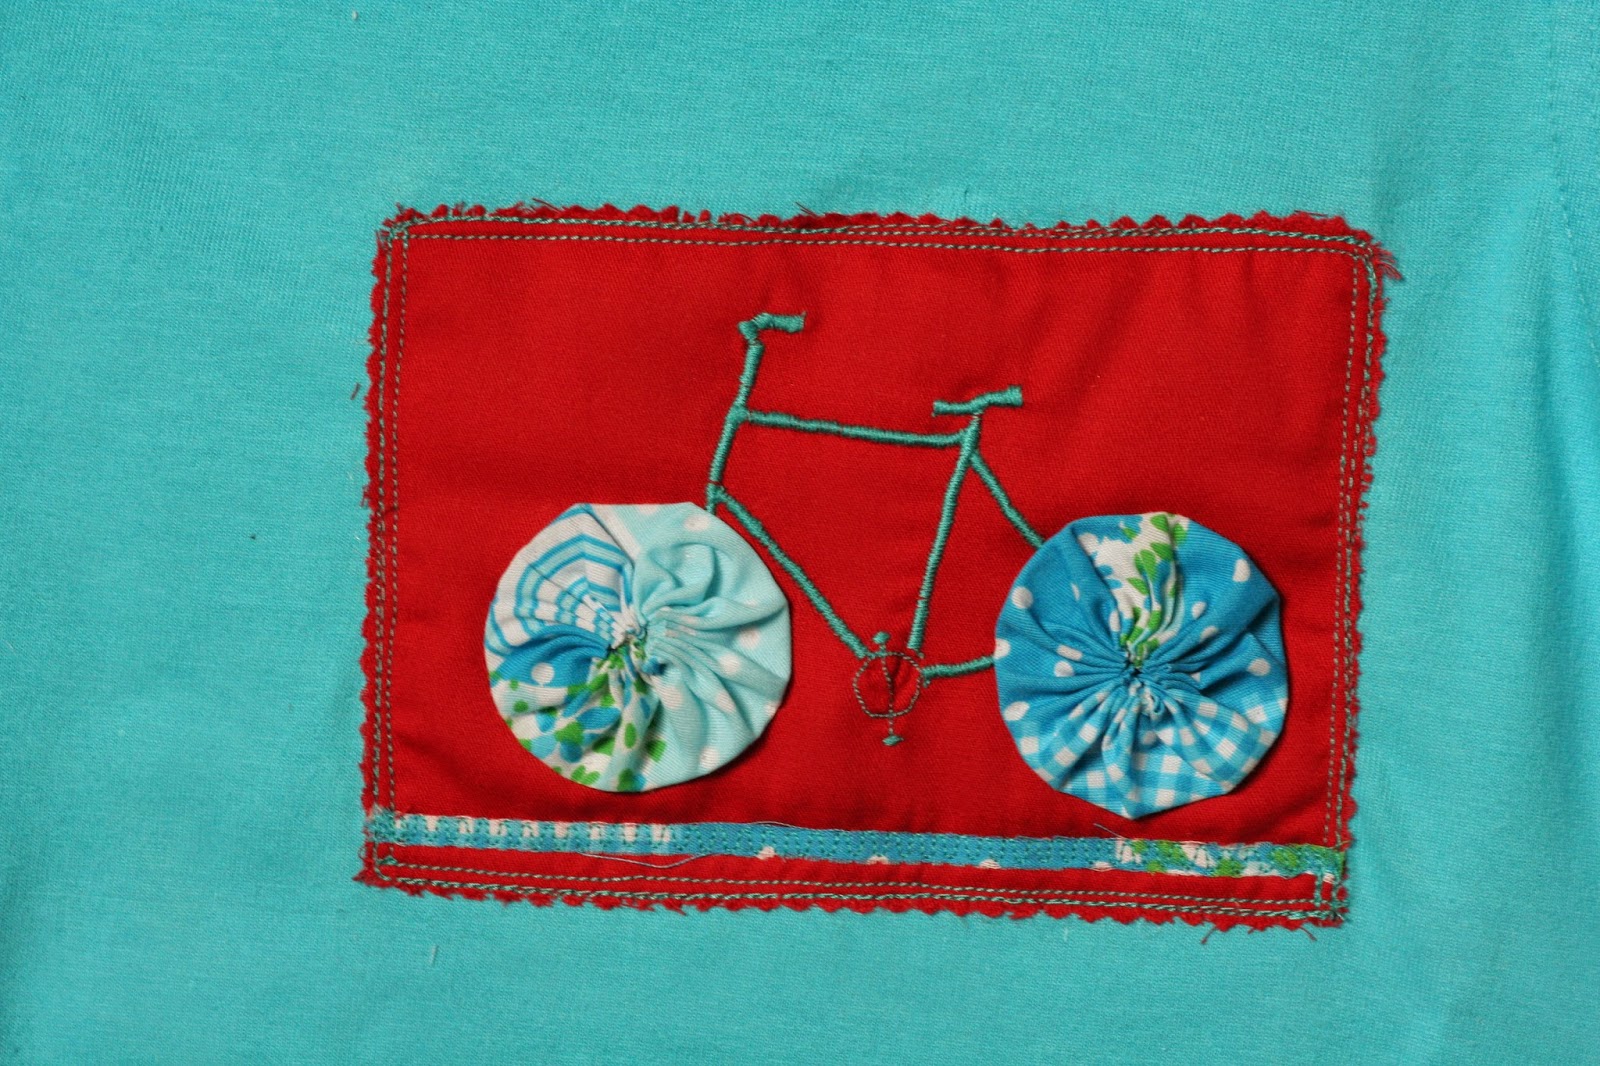
Another 3 Suffolk Puffs get put to good use atop an ice cream cone....


Basic Tutorial:
  • Draw a cone shaped triangle on your 'heat-and-bond' or similar iron on adhesive product & cut out.  Iron this triangle onto the fabric you've chosen as the cone.  I had some stripy orange-ish fabric that worked well for my waffle cone. Then cut out the 'heat-and-bond' backed fabric triangle.
  • Using a water soluble fabric pen, rule lines parallel to the long edge of each side of the triangle.  These will form the guiding 'waffle' lines to sew along on the cone.
  • Next sew 3 Suffolk puffs out of plain coloured fabrics - these will become the scoops of ice cream.

  • Iron the cone in place onto the garment you've chosen to use (I've used a baby grow).
  • Using a short length (2.0) straight stitch sew around the edge of the ironed on cone & then along each of the ruled lines to create a waffle pattern ( I later ended up using a close zigzag stitch around the border of the cone to help it stand out once the Suffolk puffs were stitched in place- you can see this in the finished ice cream cone at the top of this entry).

  • Pin the Suffolk puffs in place overlapping each other and the cone & then hand stitch each one using matching thread.
  • Almost good enough to devour!

Thursday, 2 June 2011

Springtime flowers

There is a definite chill to the air, finally.  Winter is here and the rains have also fallen for the last few days, finally.  The plants in the garden are perking up again, and the kangaroo paws are beginning to flower. Perhaps this is what prompted the flower design of today's creation with the aim of using up some of the Suffolk Puffs I had lying around.
I discovered how to make 'Suffolk Puffs' in a craft magazine late last year, and since then have found a number of applique uses for these handy, and very quick and easy to make, little circles of fabricy-puffiness.
Springtime Flowers
Basic Tutorial:

  • Make 3 Suffolk puffs, one slightly larger than the others as follows:
    • for each puff, cut out a circle of fabric approximately 2/3rds larger than you want the finished puff to be
    • using a needle and thread, use a running stitch to sew all the way around the circle, turning over a small seam as you go 
    • pull up both ends of the thread to form a little pouch, knot ends together and then flatten fabric to create the puff.
  • Sew 3 stems onto the baby grow using straight stitch on a machine
  • Cut out 3 pieces of green fabric with 'heat and bond' ironed onto one side to create the leaves and then iron these in place
  • Machine applique the 3 leaves using a small straight stitch and stitching around each leaf twice.  Don't worry about sewing a perfectly straight edge, as long as you catch the edge all the way around to prevent excessive fraying.
  • Hand stitch the Suffolk puff 'flower' heads in place & you're done.