Friday, 20 December 2013

Feeling Christmassy!

Someone is a bit excited about Christmas this year...


and so am I! Any excuse to be extra crafty & creative:) A Christmas Grinch dress/top for Little Imp that received the seal of approval.

Of course a Christmas hair clip is also required to finish the look. Same technique I've used before to make a felt hair clip. Simply cover a clip with felt sewn together with blanket stitch & then glue on something Christmassy - a wooden tree decoration in this case.
                               

Some Christmas 'stocking' drawstring bags. I had thought I would make proper stocking shaped stockings, but where would I hang them and what if the presents were too big to fit in the small opening? A drawstring bag seemed far better & this pattern for a lined drawstring bag by In Colour Order was fantastic. I just adapted the sizes a bit to suit what I wanted.


I think we are almost ready for Christmas day!

Just now it is time for another fruit mince pie though!
Instructions for the dress are here.

Tuesday, 17 December 2013

Some more elephant softies


I made a felt elephant recently for Little Imp's cousin....  


...and then, perhaps against my better judgement (given the excessive number of soft toys Little Imp already has) I agreed to make her one for Christmas too.  Given she is a bit older now I thought a cotton print fabric for the body would be more fun. And I think I was right! 


Given how much I liked how that one had tuned out I figured I may as well make her other cousin one too.

So now I have 3 elephants waiting to meet their owners.


I have made elephants for friends before from this Woman's Weekly pattern, but this time I also worked out a great way to add a 'jingle'. I've found in the past that when I insert the little metal bells into softies that the bell becomes far too muffled by all of the fibre fill. My solution in this instance was to do away with the bell altogether & instead I put some beads into a small plastic canister about 4cm high x 2cm diameter. The elephant is fat enough that I could stuff the canister into the middle of it's body still not really don't notice it among all the stuffing. Super Jingly too!


A link to some other elephant softies I've made in the past

Friday, 13 December 2013

Kura bed - an ikea hack

An Ikea Kura bunk bed and an' Ikea Hack' of sorts.

I finished this AGES ago, but haven't got around to taking photos until now. Perhaps that is in part to the fact Little Imp's bedroom is not often quite this tidy!

There are lots of different ways of using the Kura bunk bed, but I haven't seen one that simply leaves out step to leave accessible storage space underneath.


We (the 'Royal We' that is - Little Imp's dad!) made up the bed as instructed other than inserting one of the panels (the longest one opposite the ladder) that in theory would stop your child falling out of bed when it is used as a bunk bed. This leaves a great sized area under the bed for storage - including the panel we haven't inserted into the bed.

I guess you could use a valance to hide the opening to the storage space. In this instance though, a well positioned armchair and some sheer, embellished curtains that I have made and hung part way around the bed work for us (these pics show the curtain slightly pulled back to reveal the storage space) that is normally pretty well hidden.


Of course this project lent itself to lots of fun - a place to stick all the butterfly wall decals we hadn't used yet and time spent making up coordinating bunting and little curtains to embellish the new bed. Fun creative times indeed!

To make the curtains
Stitch together fabric patterned scraps, embellish however you like and then sew onto solid coloured fabric.

Cut out sheer curtain fabric to the length you want plus a few inches extra. Fold over the top and stitch to create a tube for hanging the curtain. Hem the bottom.
Then gather lengths of ribbon, fold an inch over at the top and pin in place along the top edge of the curtain. Cut out some butterfly shapes from coloured netting and arrange to please along with the fabric pieces you made up before. Pin all in place.


Stitch each of the ribbons in place along the top of the curtain.
Stitch  a reinforced line through the middle of the net butterflies and around each of the fabric pieces.


Hang the curtains and some lovely bunting....bed time for little ones!


ps. if you like the armchair in the pictures here's the link to my armchair recovering post

Tuesday, 10 December 2013

Another crinkly tag toy....and an elephant!

OneLittleImp has a new cousin! So what have I made for her for Christmas?

A few little things...


First up the tag toy. I think this is the best version I have made, this time in flannel. My felt version was probably a little simpler, but this one does look neater and a bit more 'finished'.  The elephant is an old pattern from a Woman's Weekly, made mostly of felt, and a little bit of left over flannel for the ears.

Tag Toy
Basic Tutorial:
  • cut 2x approx 7 inch squares of a flannel fabric
  • cut 2x 6.75 inch squares of batting
  • cut a 6.5 inch cello square
  • cut ribbon of various lengths (between 4 - 12inches)

Fold over approx 1/2 inch along all four edges and iron to crease once square of flannel fabric. I spent a few moments hand stitching each of the four corners so they looked nice and neat. Trim the excess fabric at the corners before you do this if you need. 


Tuck one piece of the  batting the 'frame' that you have now created. Then repeat all of these steps for the second piece of flannel and batting.

 Place both squares together, batting on the inside and iron on a warm (not hot) setting to flatten and ensure their edges match pretty closely.


 Take apart and place the piece of cello on one of the squares.

Close back up to form a sandwich - flannel, batting, cello, batting, flannel - and pin temporarily to hold edges neatly together with a few extra pins in the centre to keep the cello in place. Then start to insert the pieces of ribbon.

Fold most of the ribbon pieces in half and then slip in between each half of the flannel/batting sandwich, with a good inch or so within the sandwich and pin in place. This will ensure the ribbon is well picked up by your finishing edge stitches and less likely to unravel in time. I also doubled over the thinner (teal) ribbon in a few spots for a bit more interest.  Make sure your corners and edges are still aligned before the next step.

  • Using a straight stitch, machine stitch the fabric squares together about 1/4inch from the edge,  removing pins as you go & ensuring you catch all the ribbons. Then stitch another line all the way around, close to the first.

Finally stitch a square in the middle (to help hold the cello in place) and you are done!


Wednesday, 4 December 2013

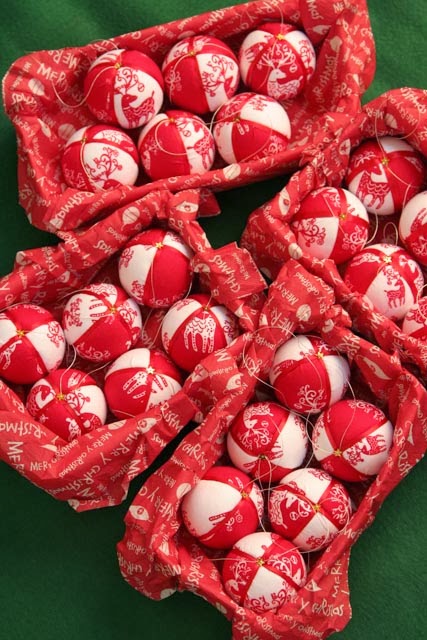
Fabric covered baubles

It isn't Christmas without festive baubles now is it!?

Here is one way of making your own fabric covered versions to pretty up the tree.

Gather your supplies:
Polystyrene balls (the ones I used were 50mm)
Coordinating fabric pieces
Matching 5mm ribbon
Scissors
Pencil & felt marker
Sharp knife to cut polystyrene
Butter knife (I used my pocket knife)
Gold stars (ones with the hole in the middle) or bead
Dressmaker pins
Elastic band that fits snugly around polystyrene ball
Template cut out of card (see pic below) – a pointy ended oval shape 9.5cm long & 5cm at the widest point (this will cover 50mm diametre balls)

Using template, mark and cut out 4 pieces of fabric for each ball. Depending on the fabric pattern you may want to position the template to get the part of the print you want. I cut 2 red print and 2 white print for each bauble.

Next you need to mark lines around the circumference of the ball to divide it into quarters. I used the circle on my mathomat to mark the points of the quarters and then slipped an elastic band over along these points to use as a guide to then mark the line. If you don’t have a mathomat you could probably just use 2 elastic bands and judge this bit by eye before marking these lines onto the ball.
 
 Using a sharp knife, cut along the lines you have drawn, about 5mm deep all the way around. Then take the first piece of fabric, place it over one of the quarters of the ball, lining it up so that it will cover all of that quarter when poked into place.

 Use a blunt edge such as a butter knife (or pocket knife tool) to begin to poke the raw edge of the fabric into the cuts in the polystyrene you made before. Starting this at the middle / widest part and working your way towards the point at each end in turn makes it easiest to keep the fabric nice and smooth. If you make a mistake, just pull out a bit and re-poke it in.

 Repeat until you have all 4 pieces of fabric poked into the ball. If you end up with excess bulk/fabric that you can’t poke in then just snip away some of the excess – make sure not to snip too much though!

 
Cover up the raw edges of the fabric using the ribbon. Start at what will be the top of the bauble and run the ribbon around one circumference line.

 When you reach the top again, twist the ribbon as shown and then track down the other circumference line – covering up all of the raw edges.


 I found it easier to pin the ribbon once it crossed over at the base, and similarly at the top to hold it in place. Snip the ribbon.


 Take a gold star (or bead) and thread it onto a pin. Tie off some gold thread and then poke the pin through the knot.


 Place this threaded pin into the top of the bauble & voila – now you can hang it on your tree...

 ....or box it up with all the others you will make as gifts!

Tuesday, 26 November 2013

An easy peasy cushion cover

I'm still alive, still crafting!
Was about to upload a post last month when I realised with a rude shock that I had gone WAY over my internet usage for the month - oops. So been offline for a while....but that has maybe meant more spare time spent in the ButtonRoom:)

Anyway, back online now and have loads to share!

Life before going to Thailand in October was hectic enough, but in the few weeks before we left I suddenly realised I definitely needed to make a padded laptop case for my laptop that was coming with us, and a travel pillow for OneLittleImp. Oh, and I also had someone contact me via my blog asking if I could make one of the giraffe t-shirts she had seen on my blog for her daughter's birthday . What a lovely surprise that was - and even a bit funny when I realised she lived all the way in Texas! So now I have sold my first item through my blog....exciting stuff!

So of course I fitted all of this craft in between packing and writing lists and cleaning the house so it would be nice to come home to (that does make such a difference to post holiday blues!)  and packing some more.

First up is the easy peasy cushion cover. This takes almost no time at all to make. No buttons, or velcro or anything! Promise.


First up, measure your cushion, add 1.5 inches as allowance on each side & then cut your front piece of fabric (the owl print in this case) to this size. For the back you will need to cut 2 pieces, both the same width as the front. To work out the length, divide the width measurement in half and then add 3 inches (so if the width was 14 inches - 14 divided by 2 = 7.  7+3=10, so you would cut 2 pieces of the backing fabric 14 inches wide x 10 inches long). This will mean that you end up with the back pieces overlapping by about 3 inches.

Fold over 1cm or so along the width of each back piece, iron & then fold over & iron again to get a nice neat edge.

Stitch along the length of this nice neat edge to secure and create a 'finished' edge. I used a fancy wavy stitch, but a straight or zigzag stitch would work just as well.

Next, place the front of the cushion cover right side up. Lay one piece of the back fabric right side down, raw edges lined up with the front piece raw edges & the 'finished' edge positioned as shown. Pin the bottom edge of the front and back pieces together.

Then lay the other piece of 'back' fabric right side down onto the front fabric and overlapping the first piece of backing fabric. Match up all the raw edges again and make sure that the 'finished' edge you sewed earlier should sit as shown in the picture. Pin all the way around to hold all the layers together.

Now sew all the way around all 4 edges of the cushion cover using a straight stitch. I then also zig zag stitched all the way around to reinforce & prevent fraying.
 Clip the corners & then turn your cushion cover right side out. Iron if you need to & hey presto - you are done! All that is left to do is stuff in the cushion.


Nothing fancy, but it sure did the trick as a comfy travel comforter during our trip:)