Friday 30 November 2012

Felt Pear


Tutorial

Instructions for one brownish coloured pear - but you could choose any 'pear-y' colour of your choice.

Materials - light tan felt (about 15cm square), brown felt scraps, dark green felt (small piece) needle, thread, stuffing, sewing machine (optional)


Pear leaf
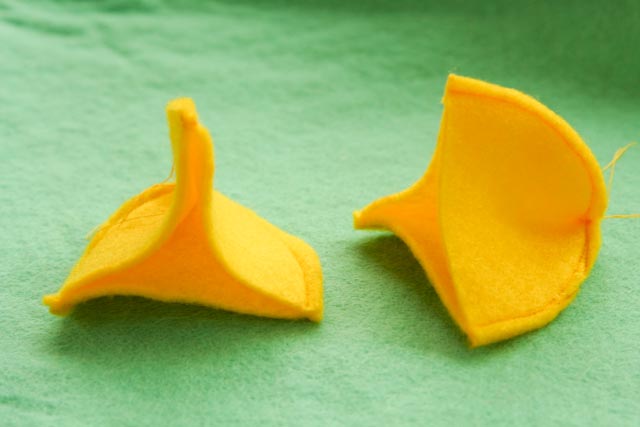
Using a sewing machine free motion embroider a rough leaf shape outline onto green felt   Cut out the leaf leaving a small border outside the stitches.  Alternatively you could cut out the shape & then hand stitch the detail on later. 

Pear stem and 'calyx'
From brown felt cut a 1cm x 1cm square & then snip away at this to get a rough 6-point star shape - this will become the little brown bit you find on the base of a pear.

From brown felt cut a rough 5cm x 2cm rectangle for the stem.

To make the stem with the leaf attached, place the leaf onto the brown rectangle as pictured above.  Then roll the rectangle up lengthwise from right to left (towards the leaf), catching the stem of the leaf in the roll of brown felt.  Stitch & wrap matching dark brown thread around & around to form the stem & hold it in shape with the leaf firmly attached.


Pear 'body' - From tan felt cut 3 pieces of the pear template shape.

Stitch 2 of these pieces together down one side from one point to the other.

Then add the 3rd piece and stitch in place down one side.  Then stitch the final seam  to create a 3-piece pear shape', leaving a 2-3cm opening at the base of the pear (the fat end) and a smaller 1cm opening at the top end (narrow end).
2-3 cm opening in stitching at fatter end (right) and 1cm opening at  narrow end (left)
Turn pear right side out through the larger hole at the base and fill with stuffing via this same hole.  Push the stuffing up so it fills in the narrow top end also, then stitch up the base hole.

Attach the calyx (small brown star shape) to the base of the pear with matching dark brown thread
Left - stuffing hole in base stitched closed.  Right - Calyx added and stitched in place

Now turn your attention to the small hole you left at the top of the pear. Poke a finger down into the hole to create a bit of a gap in the stuffing & then poke the stem part way into the hole. Hand stitch hole closed and also stitch through the stem a few times to secure it in place. 

For this next step, use the longest needle you have as you need to stitch with a double thread from the top of the pear all the way through to the bottom.  If your needle isn't long enough then squish the pear down to get the needle through.  Pull the thread tight enough to create slight indents at the top and bottom of the pear and stitch in place to secure.  This step gives the pear a bit more of an 'pear-y' shape by bringing the top and the bottom points in towards each other.

I think this might be my new favourite felt fruit...

Wednesday 28 November 2012

Half lemons

I've already made a standard full, uncut lemon (tutorial here) and I had a plan that I would make two halves of a lemon that could be stuck together with velcro to make a whole lemon...and then 'cut' apart by Little Imp to make some more 'lemin' tea.

But I couldn't get my plan to work.  Most frustrating! The halves look good enough individually:
 

But the plan to be able to 'stick' them together for 'cutting' apart just didn't work.  I couldn't get the face of each lemon half flat enough to be able to stick them together nicely.  If I'd had yellow velcro that I could have used as the segments that may have worked, but the velcro circle I used in the middle isn't big enough to overcome the bulge of each half.  

I'm not going to give full written instructions for the half lemons given they didn't work how I wanted, but here is a bit of a 'how to' in pictures.

Cut 3 elongated 'lemon' shapes

stitch 2 of these together

add the third shape and stitch on one side

stitch down the last seam, leaving no hole for turning right side out

find the centre and cut the shape in half
 I wonder if I had made the two halves separately from the beginning if they would have fitted together better? Not sure.
open out both halves and trim edges level

cut out a white & yellow circle. Cut down yellow circle to form segments. Stitch these onto white circle
 This is where I also added a small velcro circle that you can see below, but this really didn't work so I wouldn't bother next time.
Use blanket stitch to attach white circle with segments to stuffed lemon half
Finish off each half like the whole lemon  - a small green wool know on one and a stitched 'nobbly' bit on the other (see the original lemon tutorial for details) 

Any ideas on how to make 'cuttable' felt fruit welcome!  One friend suggested magnets which I think could work, but I haven't tried that yet.

Saturday 3 November 2012

Felt Banana


The felt bananas have almost been my undoing in this challenge of making felt food items without looking up pictures or patterns on the internet.  I came VERY close to cheating on more than just one occasion.  But I restrained myself & in the end have managed something that might not be the best of my creations, but does resemble a banana at least.

I wanted to make a banana that could not only be removed from the skin but that could also be fully peeled and unpeeled, with the skin closing right over the banana.  I had imagined I could use velcro to make this happen but in the end, after many swear words,  I have settled for a banana with skin that doesn't quite join up at the top so it will never fully close.  Sigh.


Tutorial
Instructions for one banana
Finished size approx 23cm long 
Materials - yelllow felt, cream felt, small scraps of brown felt, needle, thread, stuffing & sewing machine (optional but faster!)


First the easy part, the banana itself.

Fold cream felt in half lengthways.  Draw around outline of pattern template as indicated.  Pin through both layers of felt to secure.


Machine stitch around outline, leaving a gap for stuffing on the inside curve of the banana. (see below for an alternative of adding seed lines onto each banana half before stitching together)

Cut out banana close to the stitched line and then turn right side out.

Stuff banana full of stuffing and then hand stitch opening closed.

Option: I also tried making a banana with the stringy bits most people pull off (phloem bundles, part of the banana's vascular system if you want to know the botanical name...celery has phloem bundles too...and no, I don't remember learning this in a botany lecture...Google taught me this time around).
Not sure which version, stringy or non-stringy,  I prefer as the end product - picture below shows both banana halves cut out with added 2 lines of stitching to resemble the stringy bits).  I then stitched both these halves right sides together, turned inside out and stuffed.

Now for the tricky bit.
Actually, with a pattern it isn't too tricky at all...it just took me a number of goes to get the pattern right.
Problem is that at the moment my camera has died so I can't take a picture of the pattern I finally came up with yet.

Here's the basics for now however:

Firstly mark out each pattern piece onto yellow felt and cut out. You may find it is worth numbering & marking each piece on the wrong side.

From left to right:  Piece 3 - Piece 1 - Piece 2.  
In the instructions to follow side A is the left side of each cut out piece as seen in the picture above and
side B is the right side of each piece.

So,
Stitch side B of piece 1 to side A of piece 2 (right sides together), matching the pieces at the bottom and stitching up to about 2-3cm cm from the top. Secure the thread at the end of the stitching.

Then stitch side A of piece 3 to side B of piece 2, making sure to match up pieces at the bottom and then stitching to about 2-3cm from the end of piece 2, again securing the thread well. 

To close up the skin then stitch side B of piece 3 to side A of piece 1, again finishing 2-3cm from the top and securing thread well.

Then turn skin right side out.  Cut a small triangle with curved corners out of brown felt and then stitch this to the base of the banana as shown.

Then take the rectangle shaped end of piece 3 of the banana skin and fold each edge in to meet at the middle (shown in left of photo below held down with my finger).  Then fold this in half and pin before stitching to secure.  Trim threads, insert banana and you are finished!
Left of pic- each edge of the rectangle on piece 3 of the banana skin folded into the middle.
Right of pic - folded in half again and secured with a pin

Rectangle part of piece 3 shown folded as described above just before being pinned.

Finished bananas and their skins (the one with the phloem bundles is in the right!)