Showing posts with label felt fruit and veg. Show all posts

Friday, 11 July 2014

Felt Heirloom Carrots

Another felt vegetable installment, this time a variation on the original felt carrots I made a while back. Little Imp loves helping her dad in his garden, and takes delight in seeing the different colours of the heirloom carrots coming out of the ground, including the red 'beetroot' carrots.


The method for making these is the same as my original carrot post, but with one final step to make them a bit more 'bunky', a bit less like the straight, symmetrical shop bought variety.

To achieve the kinks in the carrots secure a doubled over matching thread somewhere along one one of the sewn lines on the carrot, then fold the carrot over & pass the thread through to another sewn line. Keeping the carrot bent between these two lines, tie off the thread. When you let go, the short secured thread will maintain some of this bend as a kink in the carrot. Add more kinks if you like for a really bunky carrot!


I liked the more authentic look this gave the carrots so much I have now added some kinks to the stock standard orange carrots too.

Now if only I could actually get Little Imp to eat carrot!


Thursday, 10 July 2014

Felt Mushroom

I'm on a bit of a roll with felt fruit & veg again. Little Imp is pretty excited to have some additions to her original fruit basket.

Little Imp is known as 'Mushroom Girl' by our local greengrocer given we very often buy a mushroom or two to nibble on the way out. About time I made some mushrooms then!


Prepare the pieces you need for the mushroom:
Mushroom button 'top' – Use something circular as a template (like a glass) to draw and then cut out a circle approximately 8cm in diameter.

Mushroom stalk – cut a rectangle approx 3cm x 6cm.

Create the stalk by rolling up the felt along the short edge and then stitch to secure along the open seam. I also ran a thread through the width of the stalk a few times for extra hold.


Now for the button top. Double over some matching thread & secure at a point on the edge of the circle. Then, using a running stitch, sew all the way around the mushroom top, close to the edge, in the same way you would to create a Suffolk puff. Once back to where you started, pull the thread to gather and form a little bowl.

Assemble the mushroom by adding a small amount of stuffing into the ‘bowl’ (definitely don't over stuff these ones).  Then pull up the thread to begin to close the hole until it matches the diameter of the stalk, then tie off the thread to secure.

Poke the stalk into the hole and then sew back around the mushroom passing the needle through the gathers of the button top & the stalk in turn to attach the gathered top securely to the stalk. When doing this, make sure to keep the mushroom top quite flat (that is, when passing the needle through the stalk make sure you keep close to the top end of the stalk).

Once stitched all the way around, pass the needle through the stalk several times from different spots to really secure the stalk to the 'button' of the mushroom.


Oh by the way...
A fruit basket that can also become a chef's hat apparently!


Thursday, 3 July 2014

Felt Avocado

Avocado aficionados will know that avocados come in many colours and shapes.  Bet they never knew though that it is a whole lot easier to make a Shepard Avocado out of felt than a Hass. (And did you know that the flesh of a Shepard doesn't go brown once cut?!?)
Why?

Because I had green not brown felt…because I wasn’t sure how to get the Hass’s wrinkly skin without a lot of work….and because the Shepard shape looked easier to replicate!

Finished size – approx 10cm high.

Materials - light tan felt (about 15cm square), brown felt scraps, dark green felt (small piece) needle, thread, stuffing, sewing machine.


Prepare the pieces - From green felt cut 3 pieces of the avocado template shape for the 'body', and 1 dark brown circle for the 'pedicel'.


Stitch 2 of these pieces together down one side from one point to the other.

Then add the 3rd piece. The best way I've found to do this is to take the joined pieces, and fold over half of the top pieces (as seen on the right in picture below) 

Then take the third/last piece of the avocado body and place this on top as shown below, matching up the edges all the way around.

Stitch from top to bottom along the right side seam.

This will leave you with one seam left to sew.

Again, match up the seams and stitch from the top, to bottom - making sure to leave an opening at the bottom end for turning right side out.

Turn right side out & stuff before stitching the opening closed with matching green thread. Don’t worry if it isn’t nicely rounded at the base – a real avocado isn’t!

The Pedicel – 

(or little brown circle where the avocado used to attach to the tree!).

Using matching thread, sew the brown circle near the top of the avocado using a blanket stitch.
For the final step, use the longest needle you have as you need to stitch with a double thread from within the brown circle pedicel all the way through to the base, coming out where the seams meet.  If your needle isn't long enough then squish the avocado down to get the needle through.  Pull the thread tight enough to create slight indents at the top and bottom of the avocado and stitch in place to secure.  

Mmmm...

Felt Mandarin

It is mandarin season, so the perfect time to make some of these little gems.

Tutorial

Instructions for one mandarin.
Finished size: approx 4.5cm high, 6cm wide
Materials - orange felt (about 20cm square), green felt scrap, needle, thread, stuffing, sewing machine 


Mandarin 'body' - 
From orange felt cut 4 pieces of the mandarin template shape.


Take 2 of the body pieces, place one on top of the other and stitch together down one side from one point to the other.  Then do the same with the remaining 2 pieces.  You now have two halves of what will become the whole mandarin.

Open up each half and then match up, right sides together along.  Stitch from one point to the other down one of the seams. 

Then match the last two open seams together and stitch this final seam to create a 4-piece 'ball' - remembering to leave a 2-3cm opening at one end for turning right side out and stuffing the mandarin. 


Turn the mandarin right side out...


...and fill with stuffing. Hand stitch the hole closed using orange thread. This end will be the base of the mandarin.


To shape the mandarin secure thread where all the seams meet at the top of the fruit with a double thread & then pass the needle all the way through to where all the seams meet at the base of the fruit. Pull tight enough to form a bit of an indent at the top & base & then tie off securely. 


Mandarin top or 'pedicel’ (the green bit, where the flower stalk attached once upon a time.)

Cut a small 1cm square from green felt & then snip away to form a rough 4 or 5 point star sort of shape.
With matching green thread attach this ‘pedicel’ to the ‘top’ of the mandarin.

 And then make another!


Tuesday, 18 December 2012

A basket full of felt fruit

I sure hope Little Imp enjoys her basket full of fruit for Christmas!


I ended up making 2 baskets that fit inside each other so Little Imp can mix and match, shop and sort to her heart's content.  One day I might get around to posting the instructions for the baskets, but for now here is a picture instead.

Here are links to all the felt fruit and veg I have made so far:

Felt apple
Felt strawberry
Felt carrot
Felt lemon
Felt lemon halves
Felt tomato
Felt cucumber
Felt beans and bean pod
Felt banana
Felt pear

Friday, 30 November 2012

Felt Pear


Tutorial

Instructions for one brownish coloured pear - but you could choose any 'pear-y' colour of your choice.

Materials - light tan felt (about 15cm square), brown felt scraps, dark green felt (small piece) needle, thread, stuffing, sewing machine (optional)


Pear leaf
Using a sewing machine free motion embroider a rough leaf shape outline onto green felt   Cut out the leaf leaving a small border outside the stitches.  Alternatively you could cut out the shape & then hand stitch the detail on later. 

Pear stem and 'calyx'
From brown felt cut a 1cm x 1cm square & then snip away at this to get a rough 6-point star shape - this will become the little brown bit you find on the base of a pear.

From brown felt cut a rough 5cm x 2cm rectangle for the stem.

To make the stem with the leaf attached, place the leaf onto the brown rectangle as pictured above.  Then roll the rectangle up lengthwise from right to left (towards the leaf), catching the stem of the leaf in the roll of brown felt.  Stitch & wrap matching dark brown thread around & around to form the stem & hold it in shape with the leaf firmly attached.


Pear 'body' - From tan felt cut 3 pieces of the pear template shape.

Stitch 2 of these pieces together down one side from one point to the other.

Then add the 3rd piece and stitch in place down one side.  Then stitch the final seam  to create a 3-piece pear shape', leaving a 2-3cm opening at the base of the pear (the fat end) and a smaller 1cm opening at the top end (narrow end).
2-3 cm opening in stitching at fatter end (right) and 1cm opening at  narrow end (left)
Turn pear right side out through the larger hole at the base and fill with stuffing via this same hole.  Push the stuffing up so it fills in the narrow top end also, then stitch up the base hole.

Attach the calyx (small brown star shape) to the base of the pear with matching dark brown thread
Left - stuffing hole in base stitched closed.  Right - Calyx added and stitched in place

Now turn your attention to the small hole you left at the top of the pear. Poke a finger down into the hole to create a bit of a gap in the stuffing & then poke the stem part way into the hole. Hand stitch hole closed and also stitch through the stem a few times to secure it in place. 

For this next step, use the longest needle you have as you need to stitch with a double thread from the top of the pear all the way through to the bottom.  If your needle isn't long enough then squish the pear down to get the needle through.  Pull the thread tight enough to create slight indents at the top and bottom of the pear and stitch in place to secure.  This step gives the pear a bit more of an 'pear-y' shape by bringing the top and the bottom points in towards each other.

I think this might be my new favourite felt fruit...

Wednesday, 28 November 2012

Half lemons

I've already made a standard full, uncut lemon (tutorial here) and I had a plan that I would make two halves of a lemon that could be stuck together with velcro to make a whole lemon...and then 'cut' apart by Little Imp to make some more 'lemin' tea.

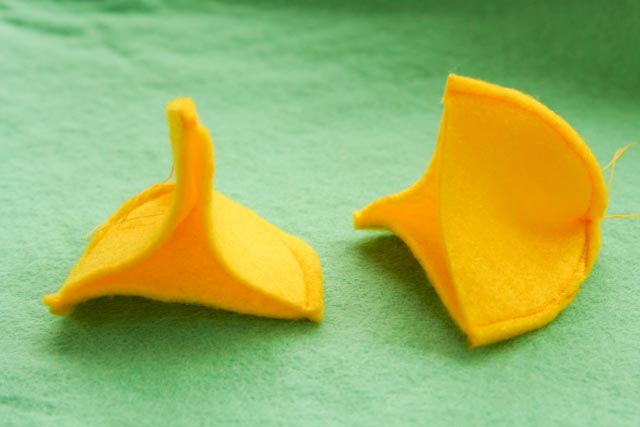
But I couldn't get my plan to work.  Most frustrating! The halves look good enough individually:
 

But the plan to be able to 'stick' them together for 'cutting' apart just didn't work.  I couldn't get the face of each lemon half flat enough to be able to stick them together nicely.  If I'd had yellow velcro that I could have used as the segments that may have worked, but the velcro circle I used in the middle isn't big enough to overcome the bulge of each half.  

I'm not going to give full written instructions for the half lemons given they didn't work how I wanted, but here is a bit of a 'how to' in pictures.

Cut 3 elongated 'lemon' shapes

stitch 2 of these together

add the third shape and stitch on one side

stitch down the last seam, leaving no hole for turning right side out

find the centre and cut the shape in half
 I wonder if I had made the two halves separately from the beginning if they would have fitted together better? Not sure.
open out both halves and trim edges level

cut out a white & yellow circle. Cut down yellow circle to form segments. Stitch these onto white circle
 This is where I also added a small velcro circle that you can see below, but this really didn't work so I wouldn't bother next time.
Use blanket stitch to attach white circle with segments to stuffed lemon half
Finish off each half like the whole lemon  - a small green wool know on one and a stitched 'nobbly' bit on the other (see the original lemon tutorial for details) 

Any ideas on how to make 'cuttable' felt fruit welcome!  One friend suggested magnets which I think could work, but I haven't tried that yet.